Enter your website home page address (the exact address doesn't really matter here, it is just useful to remember which credentials are used for which app/website) and redirect_uri value. redirect_uri is the public URL of your Nextcloud instance.
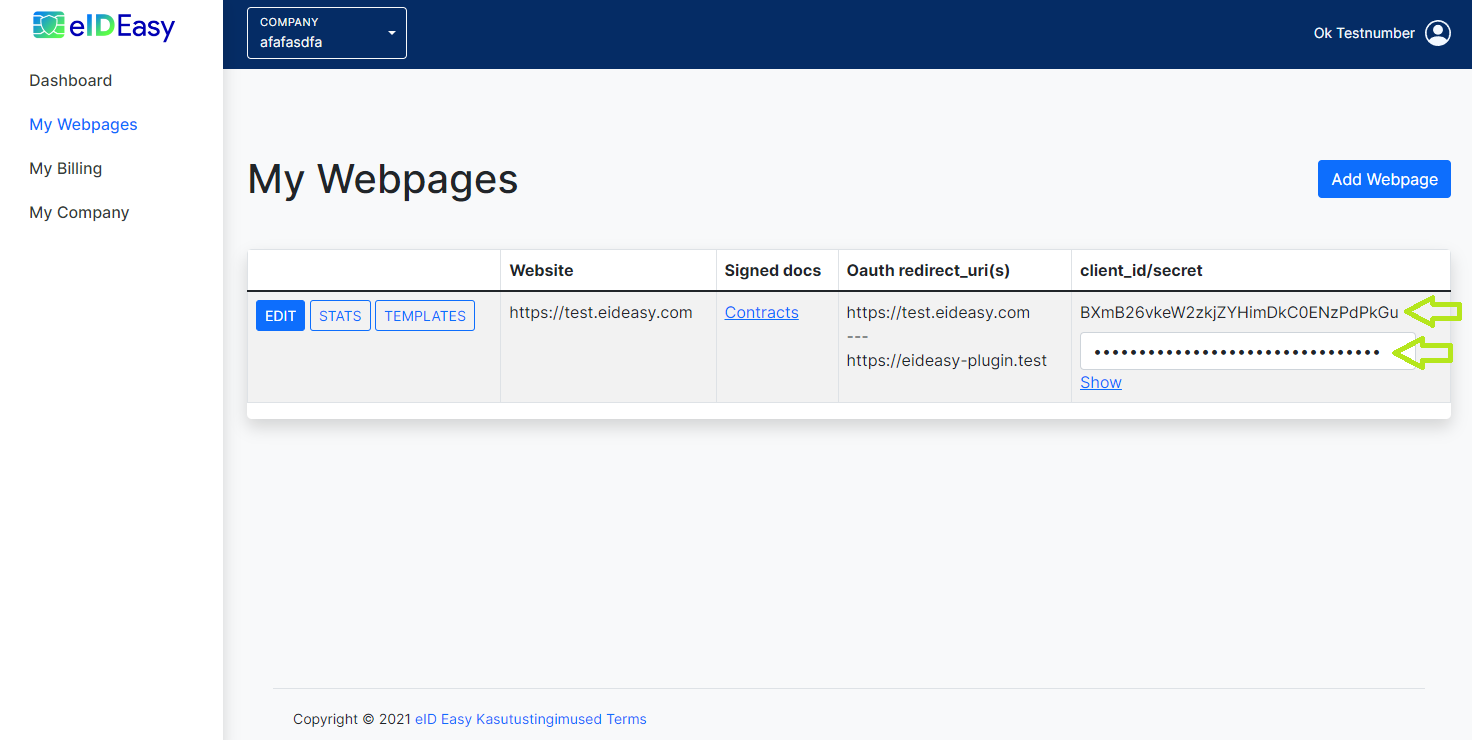
Make a note of your site’s client_id and secret. You’ll need these in the next steps.
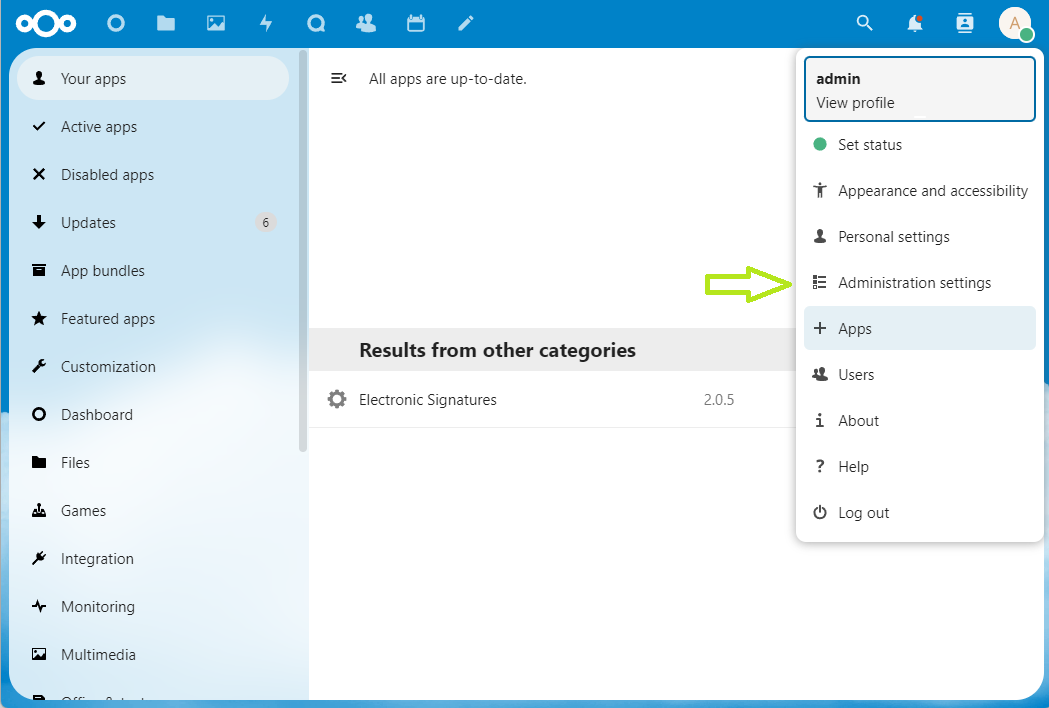
In Nextcloud, on the blue top-bar, click on your profile picture. A dropdown menu opens, click on "Administration settings".
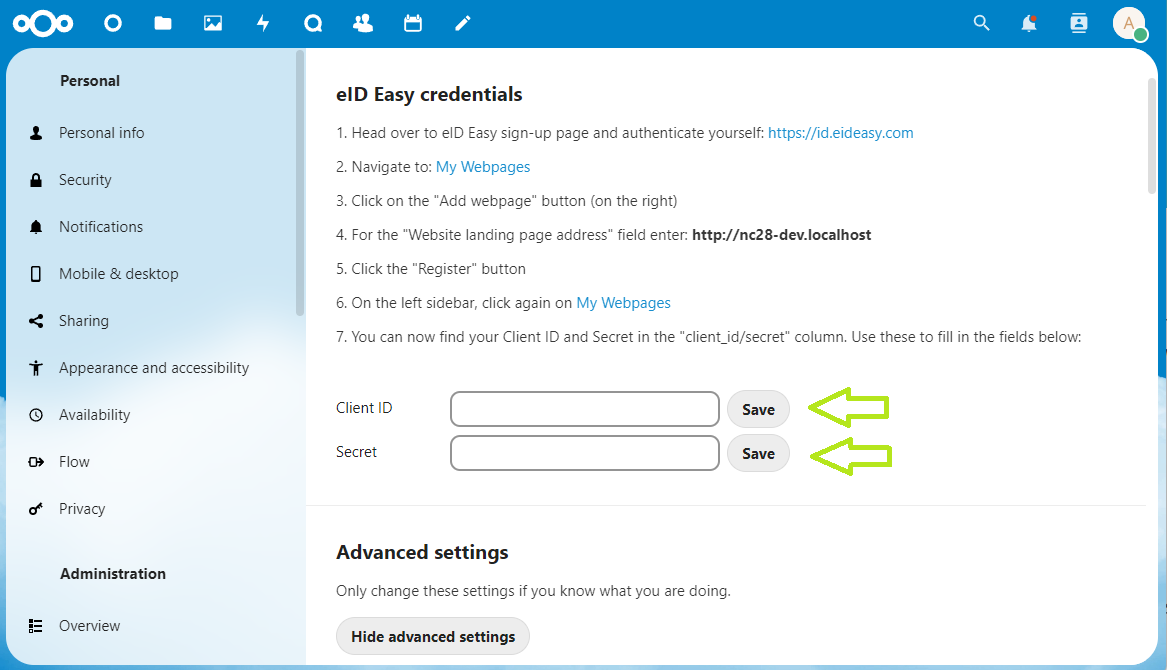
In the left sidebar, click on "Electronic signatures".
Copy the client_id and secret to the corresponding fields in the Nextcloud Electronic Signatures app settings and click "Save" for both fields.